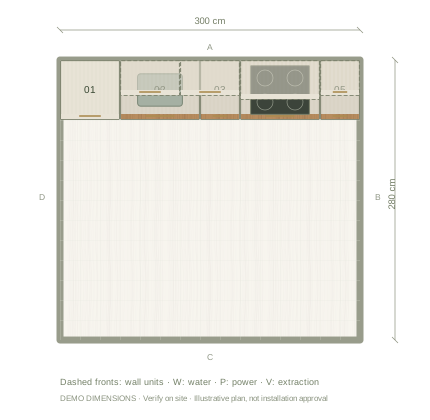
300 × 280 cm room: what the example includes
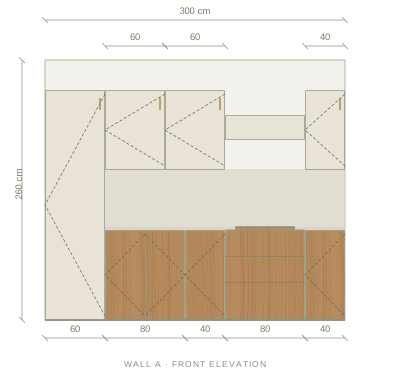
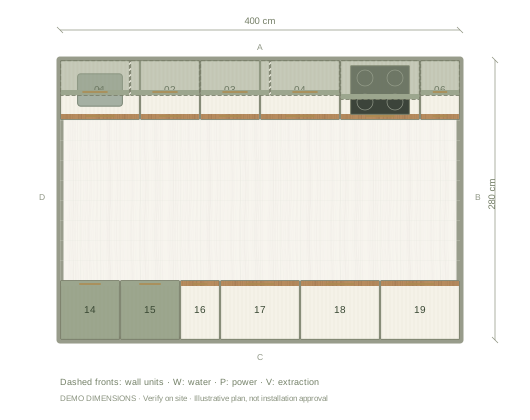
The example room measures 300 × 280 cm with a 260 cm ceiling. Floor cabinets are 60 cm deep and 90 cm high before the visual worktop; the wall cabinets are 36 cm deep and 80 cm high. These are model dimensions, not minimum room sizes or supplier specifications. Open the example, enter your room dimensions, add doors and windows, then review appliance openings before adding storage.
Choose the essentials deliberately
The example includes a 60 cm fridge, an 80 cm sink cabinet, an 80 cm drawer cabinet, two 40 cm base cabinets and a hob. It does not include an oven or dishwasher. That omission is a planning choice, not a claim that everything fits: add the appliances you need, then revise the storage allocation.
Make every cabinet accessible
The 80 cm drawer cabinet gives a different view of stored items from the two 40 cm cabinets with shelves. Check the opening paths of drawers, doors and the fridge. Use the interior view to compare those options before increasing the number of cabinets.
Use the elevation to control visual weight
Three upper cabinets are included in the starting plan: two 60 cm units and one 40 cm unit. More wall storage might be useful, but check window positions, extraction and reach. Compare an open shelf with another closed cabinet, and review the effect from the room entrance in 3D.
Compare materials in this layout
Open the editable example and change one finish at a time. Keep the camera and light fixed to compare the options.
| Option | Visual difference | What to compare |
|---|---|---|
| Cream fronts with oak | The starting palette gives the upper cabinets a light colour and the lower cabinets a timber finish. | Compare cream and white beside the same countertop. |
| Sage fronts with oak | Adds green to the same cabinet layout without changing its dimensions. | Try sage on the uppers first, then compare the entrance view. |
| Light counter with light backsplash | Keeps the two adjacent surfaces visually similar. | Compare the stone-style preset with white quartz-style finishes and physical samples. |
Digital finishes are illustrative. Compare physical supplier samples before ordering.
Try these finishes in your own copy ↗Questions before you start
Are these dimensions the minimum size for a kitchen?
No. The 300 × 280 cm room is an illustrative example. Requirements depend on your site, appliances and how the room will be used.
Can I add a dishwasher?
Yes. Add one from the appliance library, remove or resize another unit as needed, and check the water connections and open-door space.